Is your supplement carton dieline ready for production, or does it still need revision?
Release it only when you have a dieline-based production file, not a mockup or AI-generated image, and one defined configuration (production board, finished product, insert and artwork revision) has passed loaded-sample fit and closure checks, a separate labeling review and a packing trial. Most late failures come from approving something that doesn’t match what you will actually order.
This applies to secondary folding cartons, not primary-container compatibility or product stability. The trade-off is time: each added check costs a sample round or a trial day, while a skipped check moves the uncertainty into the production run, where a fix can mean a new cutting die, a reprint or repacking. When evidence is missing, keep release pending; when a check fails, revise only the affected element and repeat the checks that element touches.
Technically reviewed by Rufus Kuo, Industrial Designer at INNORHINO, November 2026.
Start With What Has Actually Been Approved
By the time a supplement carton reaches dieline review, the artwork is often signed off, the bottle chosen and the launch date set. Another review can feel like reopening decisions you have already made. In most cases it doesn’t need to.
The useful step is to separate two approvals that tend to get merged: the package looks right, and the package works with your product, your board and your packing method. Late carton failures usually sit in the gap between them, when a sample approved for appearance is treated as proof of fit, closure and assembly.
The five mistakes below are where that gap shows up most often in supplement cartons. In each case the starting point is the same: keep what already has evidence behind it, change only what fails, and complete the checks that are simply missing.
Before the Five Checks: Make Sure You Have a Production File
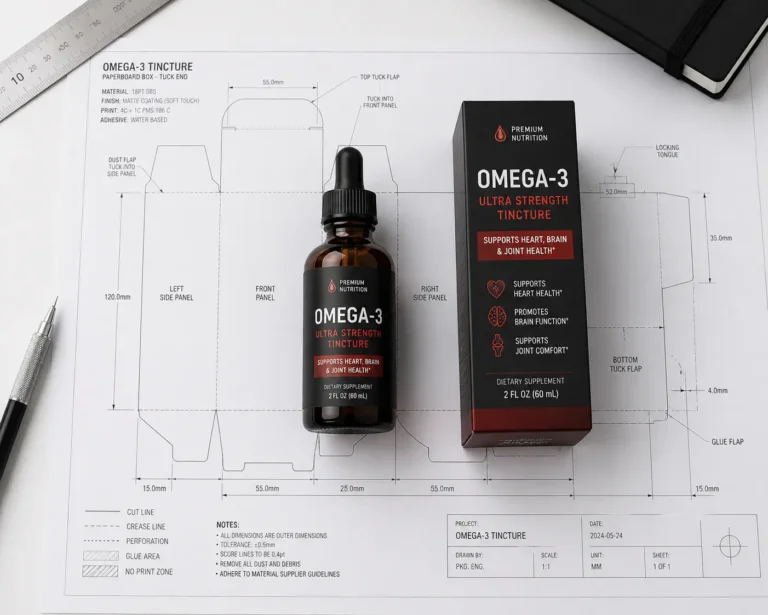
The most common gap we see starts earlier than any of the five mistakes below. Many brands come to us with a packaging image, such as a 3D render, a mockup or, increasingly, an AI-generated visual, and expect it to go straight to print. It can’t.
An AI visual shows what you want the package to look like. A dieline-based production file defines how it gets made. Between the two sit structural design and production verification.

| Comparison | AI-generated packaging visual | Dieline and production file |
| Main purpose | Communicates the look, style, color and shelf presence | Defines the flat structure used for layout, cutting, creasing and assembly |
| Dimensions | Can look plausible without being measured | States actual dimensions and confirms internal size, external size and board thickness |
| Structure | May show panels that can’t fold, glue or open | Confirms fold lines, glue flap, tuck flaps, opening and assembly order |
| Graphics | Text, artwork and placement may be distorted | Maps artwork to each panel, with bleed, safe zone and orientation set |
| Materials and finishes | Shows a visual effect but doesn’t prove it can be produced | Specifies board, caliper and finishes such as foil stamping or spot UV separately |
| How it’s verified | Confirms the visual direction | Plain white structural sample, printed proof and packing test |
Having a dieline doesn’t mean you have a complete production file, either. The dieline defines the structure. A file ready for production also needs finished artwork on each panel, usually as an Illustrator (.ai) file or a print-ready PDF, set up in CMYK color mode with images embedded and text converted to outlines. Cut, crease and glue lines sit on their own layer, and each special finish, such as embossing, debossing, foil stamping or spot UV, gets its own separate layer too. Add the board and finish specifications and a version the converter has confirmed. More complex structures can need several sets of drawings.
In our projects, closing this gap takes more time than most clients expect. Our sales team spends a large share of early conversations explaining what a dieline is and what it controls, and in many cases a designer has to rebuild the artwork from scratch on the correct structure before sampling can start.
Two recent projects show what that looks like. For a flower food brand, the job started from existing images rather than production files, so the Illustrator prepress files had to be rebuilt on the correct carton structures before proofing and testing. For a New York eyewear brand, the vector prepress file was missing and had to be resolved before artwork could move forward.
The path from idea to production usually runs in this order: AI concept, confirmed product and dimensions, structural design and dieline, white sample test, final artwork and finish specifications, printed proof, then production. Treat the AI visual as the design brief at the start of that path, not as artwork, and at the proof stage check every line of text, the Supplement Facts panel and the barcode on a printed proof or assembled sample. Skipping a step costs design time later anyway, because the file is rejected at prepress or prints with errors nobody caught.
1. Approving the Fit Before Confirming the Board
The typical failure looks like this: the bottle fit the first sample well, then the production cartons bulge, the tuck won’t seat, or the bottle binds on loading. The drawing didn’t change. The board or the product did.
If the bottle fits your current sample, keeping the box dimensions is a sound starting point, provided the sample represents what you will order. Two questions settle most of this. Was the sample cut from the proposed production board and loaded with the finished bottle, including cap, label and any neck band? And are the stated dimensions internal, external or measured between crease lines? A few millimeters of misunderstanding on that second question is enough to turn a good fit into a tight one.
The same GSM is not a complete material specification
GSM describes weight per unit area, while caliper describes thickness. They are separate properties, and a matching GSM value does not, on its own, establish a matching thickness. (Iggesund)
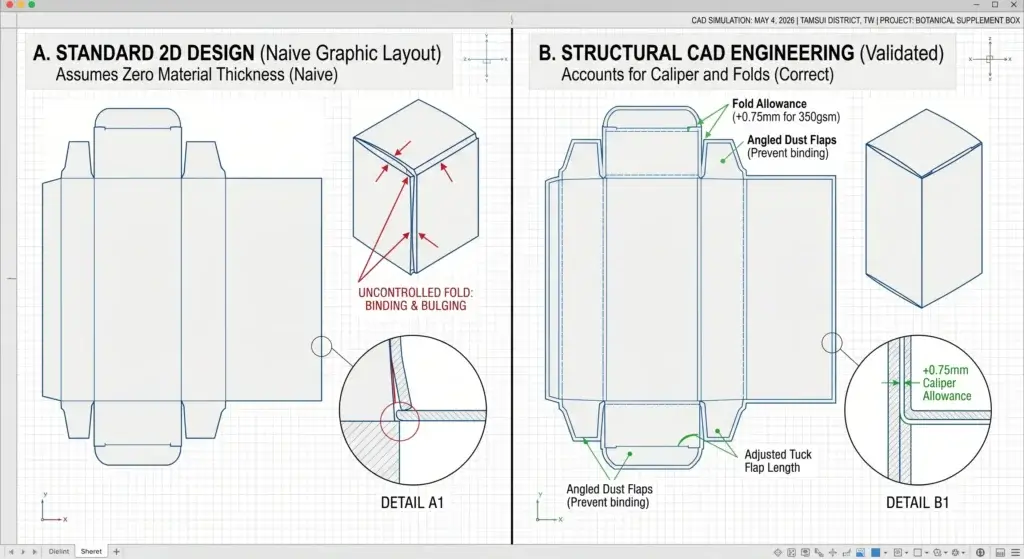
Thickness matters because a structural dieline compensates for it at every fold. That compensation, often called caliper allowance, lets panels wrap around each other and close square. Change the caliper and the allowances change with it, which is why a dieline drawn for one board can bulge or gap on another that weighs the same.
Ask the supplier to confirm the board grade, caliper and intended finishes, then review loaded samples against that specification and record any difference between sample and production materials. An early sample on substitute board is still useful for development. It is not enough on its own to approve production fit.
Agree on usable fit, not the tightest possible fit
A close fit may matter to your brand presentation, but it competes with easy loading and product removal. For approval, agree on observable criteria: the product loads without damage, the panels show no visible distortion, and the carton closes as intended. Ask both the bottle supplier and the carton converter which dimensional tolerances they can actually hold, because the fit has to work across both ranges, not just on one good sample.
Enlarging the carton is rarely the right first fix. It changes the cutting die and the artwork layout, and it can change the case pack and shipper count downstream. First establish whether the current fit works with the board you can actually order.
2. Treating Artwork Clearance as Label Approval
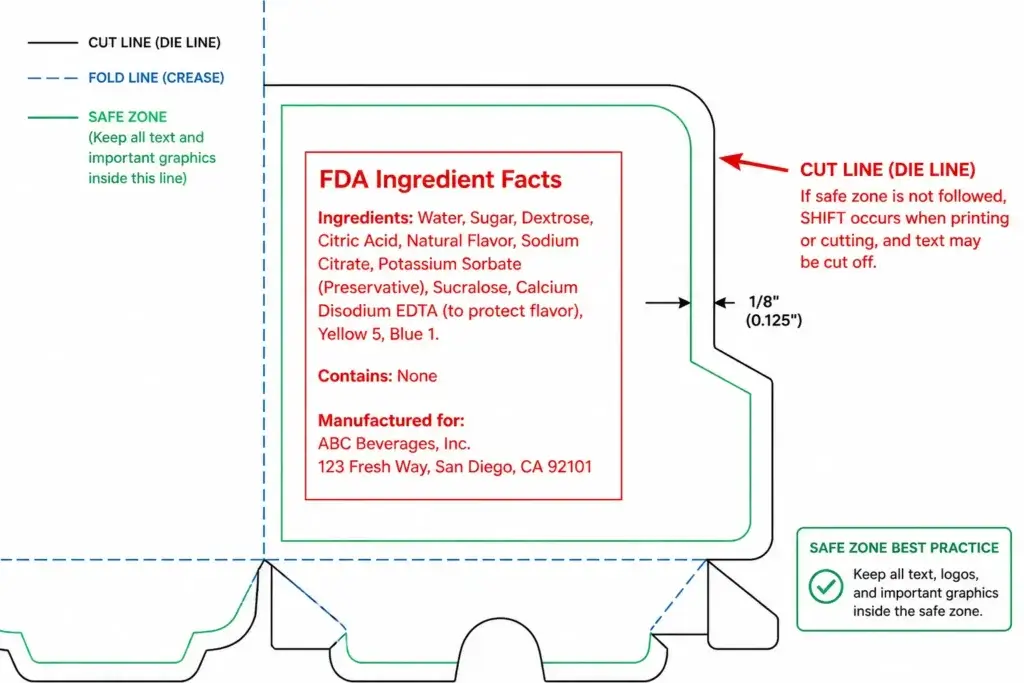
Here the failure is quieter. The Supplement Facts panel sits close to a fold, the barcode has been scaled down to make room, and everyone assumes that because the printer accepted the file, the label is done. A print-ready file and a compliant label are two different approvals, and the carton needs both.
Three separate reviews cover the ground.
Printing allowances. Bleed extends artwork beyond the trim to absorb cutting variation. Adobe’s guidance is to get the bleed size from the print shop for the particular job, so use your printer’s requirement rather than one universal margin. (Adobe)
Regulatory labeling. For U.S. dietary supplements, FDA’s labeling guide distinguishes the principal display panel from the information panel and explains where required statements belong. Your labeling reviewer should confirm the content, placement, formatting and any exceptions for the product. Keeping text away from a cut line does not establish compliance. (U.S. Food and Drug Administration)
Barcode requirements. GS1 US guidance covers barcode placement, proportions and the clear area around the symbol. Don’t distort or trim the barcode to preserve a layout. (GS1US)
When space runs short, the order of options matters for cost. Confirm the required information first, then look at secondary marketing copy, which is usually the least expensive thing to change. A structural change comes last, because it reopens the die, the layout and sometimes the shipper. That order is a starting point, not a rule; some brands will accept a larger panel to keep a minimal front.
Review the final artwork at actual size on an assembled carton, and keep print-file approval and labeling approval documented separately.
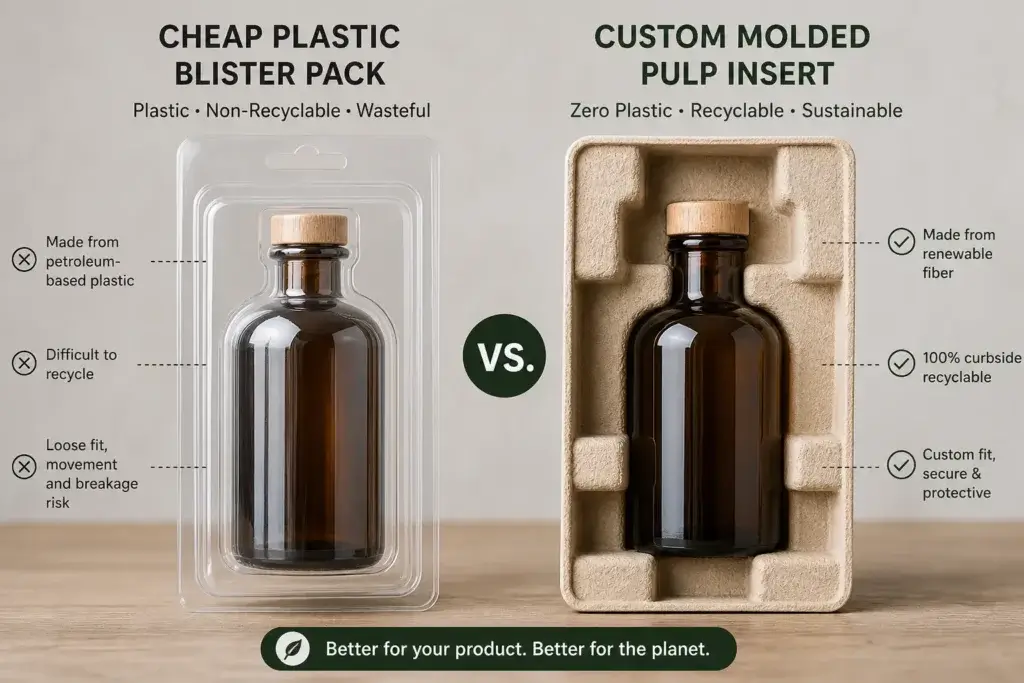
3. Choosing the Insert by Material Alone
Switching from a plastic tray to a paper-based insert is a reasonable goal, and sometimes it can be done inside the existing carton, but whether it works is a case-by-case question. The common mistake is to specify the material before specifying the job. The result is an insert that looks right in hand but lets a glass bottle shift in transit, or one that adds folding steps nobody budgeted for.
Start by defining where the product needs support, how much movement is acceptable, how the product will be loaded and removed, and what the filled weight and finished geometry are. That brief gives the design team something to engineer against. The trade-offs between paper insert formats only become useful once those requirements are set.
Evaluate the complete shipping configuration
A hand check can reveal obvious movement or a poor fit. Treat it as a first observation, not evidence of how the pack behaves in distribution. ISTA distinguishes screening tests from procedures that simulate the hazards of particular shipment types, so the right assessment depends on the distribution question you are asking, not on whether the insert is paper or plastic. (ISTA)
Test the filled product, insert, retail carton and transport packaging together, and agree before testing what counts as unacceptable breakage, leakage, movement or loss of saleable appearance. If the paper insert adds folding or loading steps, put them in the packing trial too. A material saving that adds handling time can cost more than it saves at volume.
4. Changing the Closure Before Finding the Cause
When a loaded carton springs open, lengthening the tuck flap looks like the quickest fix. It may work, but it can also hide the real cause and create a new one, such as a flap that scuffs the print or makes the carton hard to open.
A carton that springs open rarely has a single cause. The board itself plays a part, alongside the flap and lock geometry, the creases and how the product sits inside, so be cautious with any quick diagnosis. A useful first step is to close an empty carton and a loaded one from the same batch. If the empty carton stays shut and the loaded one doesn’t, product pressure on the top panel or closure is worth checking first. If both spring open, look at the flap and lock geometry and at the board. Treat these as starting points to work through with your converter, not conclusions drawn from the drawing.
Pop-open is more complex than it looks. The board itself plays a part, so pinning it on a single cause in advance is risky.
Rufus Kuo, Industrial Designer, INNORHINO
Board and crease have to be reviewed together. Holmen’s technical guidance explains that creasing settings should be matched to the paperboard and that crease geometry affects folding behavior. A crease that doesn’t suit the board can show up as harsh or uneven fold lines, cracking or a distorted panel. (Holmen)
An added seal is an option, not an explanation
A sealing label is a legitimate choice when you want a deliberate closure or tamper evidence. It is a poor substitute for understanding why the carton opens. Compare the two routes on the same basis: a structural correction may need another sample or a tooling adjustment, while a label adds a component and an application step to every unit for the life of the product. If customers will open and close the carton repeatedly, include that in the sample review as well.
Approve the chosen solution on loaded samples with the intended board and packing method, and avoid closing the issue with an undocumented instruction to press harder or add glue.
5. Comparing Carton Prices Without Measuring Assembly
Two carton quotes rarely describe the same total cost. The lower unit price may be the right answer for your project, but the comparison that matters is the cost of one correctly packed, saleable unit: carton erection, insert preparation, loading, closing, any sealing, and rework.
For a small manual run, a simpler tuck-end carton often remains the sensible choice, because the higher unit cost of a structure that needs more converting work has little volume to spread across. As quantities grow, or when a 3PL or co-packer charges by handling time, a structure that erects faster can earn its higher price. Which side of that line your project falls on is a question for a trial, not a quote.
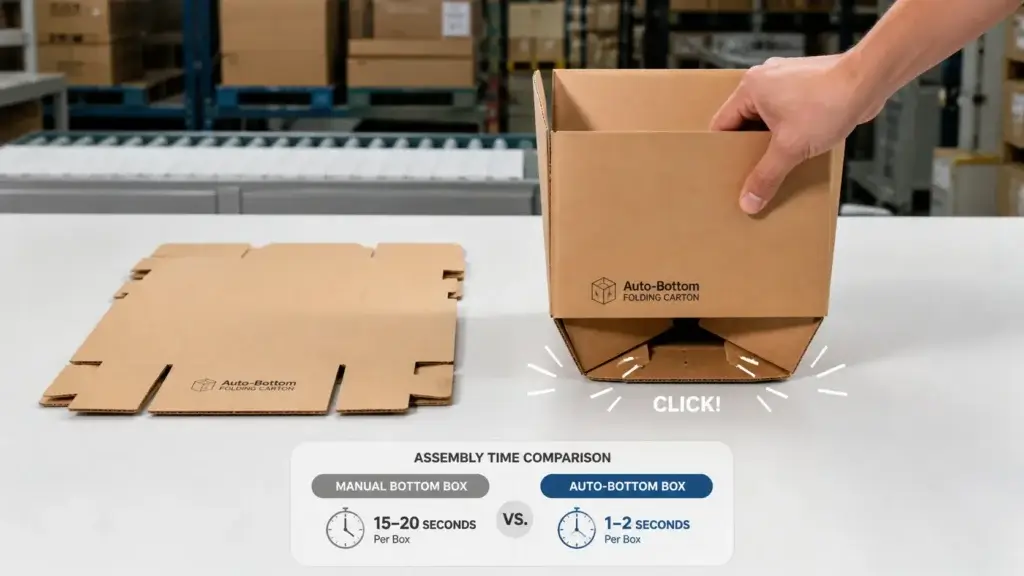
An auto-bottom die isn’t more complex. The crash-lock bottom is glued by hand, which takes a little more labor time, and that’s why the unit price is slightly higher.
Rufus Kuo, Industrial Designer, INNORHINO
Ask the packing trial to demonstrate the difference
Run the intended sequence with representative materials, the actual product and clear work instructions. Record the number of operators, correctly completed units, time used and rework. For automated packing, ask the co-packer or equipment team to define the line trial; a successful manual demonstration says little about machine performance.
Then set the added carton cost against the labor and rework savings you actually observed at the planned quantity. Without trial data, keep the claimed savings pending rather than inserting a generic percentage into the cost comparison. If you are weighing stock components against custom tooling at the same time, run both questions against the same quantity assumptions.
Turn the Review Into a Production Decision
After these checks, you should be able to tell a design problem from an evidence gap. A missing packing trial does not prove the carton is unsuitable, and the absence of a reported problem does not mean the trial was done. Use the framework below within your company’s own approval process.
| Review finding | Recommended decision | Next action |
| Agreed checks are complete, acceptance criteria are met, and the files match the evaluated configuration. | Proceed to formal production approval. | Record the approved revisions, materials, product configuration and responsible approvals. |
| No failure has been identified, but essential evidence is missing. | Keep final release pending. | Complete the specific sample review, print check, packing trial or distribution assessment that remains open. |
| A sample fails an agreed requirement. | Revise the affected element. | Document the change and repeat the checks affected by it. |
| The product, board, insert or structure changes after approval. | Reassess the affected approvals. | Identify which previous evidence remains applicable and which checks must be repeated. |
Not every change means restarting the process. A new bottle supplier with the same dimensions may only need a loaded fit and closure check; a board change touches fit, closure and creasing. The review should state what each change affects and why a particular check has to be repeated.
Prepare for a Useful Dieline Review
Bring one coordinated set of inputs. That means the current dieline and artwork as an editable vector file (.ai or print-ready PDF, not a flattened image), finished product dimensions and filled weight, the proposed board specification and any existing samples, plus order quantity, distribution channel, packing method and launch constraints. Mark undecided items clearly. An unknown material specification is more useful visible than filled in with an assumption.
Agree on acceptance criteria before evaluating the sample. Define what successful loading, closing, opening and presentation look like for this project, have the relevant specialists set the labeling, print and distribution requirements, and agree on the sampling or trial plan with whoever signs off.
Leave with a documented next action. For every open item, name the evidence required, the person responsible and the decision it will support. The next step may be a revised sample, a converter’s specification confirmation or a packing trial. It should answer the open question rather than add another review round by default.
Discuss Your Dieline With INNORHINO
You don’t need to arrive with a redesigned package. Bring the decision that is holding up approval: whether to keep the current dimensions, change the insert, correct a closure or compare packing methods.
INNORHINO’s packaging design and engineering services include production-document review, manufacturing feedback and physical sampling. Share your current dieline or product dimensions, target quantity, packing requirements and timeline, and we can work out which elements are worth keeping and which need further development or verification.
Frequently Asked Questions About Packaging Dielines
What is a caliper allowance in packaging?
Why might a custom folding carton pop open?
Can we replace plastic blister packs without increasing the box size?
What is the difference between a graphic dieline and a structural dieline?
Can an AI-generated packaging design go straight to print?
How this article was reviewed: written by Antonin Chen, Brand Strategist, and technically reviewed by Rufus Kuo, Industrial Designer at INNORHINO, for structural and prepress accuracy in November 2026. Regulatory and testing references link to primary sources from FDA, GS1 US and ISTA.