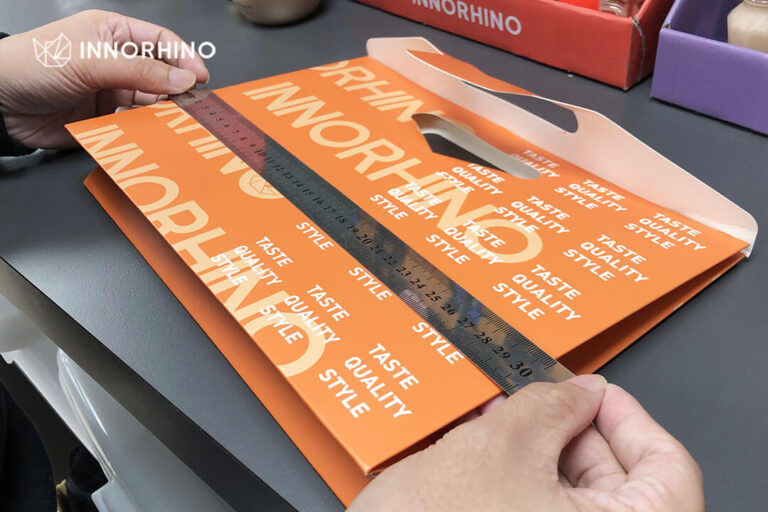
Packaging sampling is not an optional step in a custom packaging project. It is where the package meets the real product for the first time, and where you confirm that it fits, protects, prints, and assembles the way the files promise before you commit budget to a full run.
A 3D render or flat artwork file can’t show you everything. Real products have weight, tolerance, texture, accessories, inserts, labels, and handling requirements. A small mismatch in size, folding logic, material thickness, color setup, or insert design is easy to fix on one sample and expensive to fix on thousands of units.
That is why the review should go beyond how the package looks. A sample is your team’s and your supplier’s physical checkpoint for whether structure, material, artwork, color, finishing, assembly, and product fit work together in the real world.
Table of Contents
ToggleQuick Summary
Sampling reduces production risk by turning assumptions into something you can hold. A useful sample round confirms product fit, dimensions, material behavior, folding accuracy, insert stability, print color, surface finish, barcode readability, and assembly method.
The most common mistakes are skipping samples, not sending the actual product, sending only rough dimensions, preparing print artwork in RGB, ignoring material thickness, and approving a handmade sample without checking whether production can repeat it.
What Is Packaging Sampling?
Packaging sampling means making a physical version of the package before mass production, so the brand, supplier, designer, and production team can see how it works in real conditions.
A sample can test product fit and box dimensions, opening and closing, insert position, folding and gluing, material thickness and texture, print direction, color accuracy, finishing placement, barcode readability, carton packing, and basic protection in shipping and handling.
This matters most in custom packaging, where the structure, material, size, artwork, finish, and product fit are often developed together instead of coming from a standard, off-the-shelf box.
A sample exposes problems that flat artwork and renders hide. A box that looks balanced on screen can turn tight once the real product, manual, insert, and protective bag are inside. A sleeve that slides smoothly in a mockup can drag after lamination. A foil logo that looks premium in the design file can lose precision if it sits too close to a fold line.
Why Packaging Sampling Matters Before Mass Production
Packaging mistakes are easiest to fix before production starts. Once printing plates, cutting dies, materials, finishes, and the production schedule are confirmed, every change gets slower and more expensive. A sample lets your team check the package while the decision is still easy to reverse.
It Confirms Product Fit
The first job of a sample is to confirm that the product fits. That sounds basic, yet it is one of the most common sources of packaging problems. Real products can vary slightly from the technical drawing, and accessories such as manuals, dropper caps, tubes, inserts, bottles, or protective pouches can take more space than expected. A package that fits the main product alone may fail once every component goes in.
With a sample in hand, you can check tolerance, internal space, product movement, and what it actually feels like to place and remove the product.
It Tests Structure and Assembly
A structure can look clean on the dieline and still cause trouble once it is folded. During sampling, check whether the box folds correctly, the lid closes properly, and the side seam holds. The same sample shows whether the insert stays in place, whether the product goes in easily, and whether the closure feels too tight or too loose. It is also your first real look at how efficiently the package can be assembled.
These checks matter most for folding cartons, rigid boxes, display boxes, mailer boxes, inserts, and multi-component gift sets.
It Checks Material Behavior
Materials change once they are cut, folded, printed, laminated, or finished. A thick paperboard can feel premium and still crack along the fold if the grain direction and scoring are wrong. A matte laminated surface can look elegant and show scratches during packing. Textured paper absorbs ink differently from coated paper. A molded pulp insert can support sustainability goals but needs tolerance testing to hold the product securely.
Sampling shows how the selected material behaves as a finished package, which a swatch can’t.
It Reduces Print and Color Risk
Color on screen is not the same as color in print. Screens use RGB light, while packaging production usually uses CMYK ink, Pantone references, or a combination of print processes depending on the material and method.
A sample or proof shows whether the printed result matches the brand’s expectations. It also catches low contrast, small text that is hard to read, barcodes that won’t scan, and finishes in the wrong place.
It Prevents Expensive Late-Stage Changes
Skipping a sample may save a few days or some shipping cost at the start. If the package then fails to fit, print correctly, assemble efficiently, or survive handling, the delay after production starts is usually much longer. Treat sampling as insurance before mass production.
Don’t let a great packaging design fail on the production line. Grab The Design-to-Production Playbook and access the step-by-step engineering checklists you need to lock in structure, control costs, and ensure flawless manufacturing.
Mistake 1: Skipping the Sampling Stage
The biggest mistake is skipping sampling entirely. Brands usually do it to save shipping cost, shorten the timeline, or move into production faster. The risk is highest when the packaging is custom-sized, uses a new material, includes an insert, or requires special finishing.
A digital render shows design direction. It can’t fully test product fit, folding tension, closure strength, glue area, product movement, or material behavior. Without a sample, you can end up with a product that doesn’t fit properly, an insert that is too loose or too tight, a folding carton that won’t close smoothly, or a rigid box lid that feels too tight. On the print side, colors can come back different from what you expected, the barcode may not scan, and finishes can land in the wrong position. Assembly can also take far longer than planned.
Sampling is a practical checkpoint before the financial commitment, not a decorative extra.

Mistake 2: Not Sending the Actual Product
Whenever possible, send the actual product to your packaging supplier. Drawings and measurements are useful, but they don’t always reveal the full packaging challenge. Rounded edges, flexible parts, uneven weight, a protruding cap, a delicate surface, or accessories can all change how the package needs to fit.
With the real product in hand, the supplier can confirm exact dimensions and weight distribution, identify sensitive surfaces and fragile areas, and check product movement, insert fit, internal clearance, and how the product is opened and removed.
If you can’t send the product, provide the most accurate information you have: dimensions, weight, photos from multiple angles, 3D files if available, and details for every accessory or insert. A supplier designs a better package when it can physically handle the product, not just read a description of it.

Mistake 3: Providing Only Rough Dimensions
In custom packaging, small differences matter. A few millimeters can decide whether the product fits, whether the insert works, whether the box closes properly, and whether the package can be packed and shipped efficiently.
Avoid approximations such as “around 10 cm” or “similar to this box.” Instead, provide accurate measurements for:
- product length, width, and height
- product weight
- accessories
- manuals or inserts
- protective bags or sleeves
- required clearance
- shipping or carton packing limitations
For bottles, jars, tubes, and other containers, also account for caps, shoulders, label areas, and any shape variation that may affect fit. The more accurate the information, the more reliable the sample.
Mistake 4: Approving Structure Before Checking Product Fit
Looking good is not a reason to approve a structure. Before moving to final artwork or print proofing, test it with the real product: how the product goes in, how it comes out, how it moves during handling, and whether the package closes without pressure or distortion.
Inserts need the most care. A paper insert, molded pulp tray, EVA insert, foam insert, or folded paperboard insert can each behave differently depending on tolerance, material thickness, and product weight. Check:
- Does the product sit securely?
- Is the product too difficult to remove?
- Does the insert deform?
- Does the box close smoothly with the product inside?
- Is there enough tolerance for production variation?
- Will the packing team be able to assemble it efficiently?
A structure that looks clean but slows down packing or damages the product is not ready for production.

Mistake 5: Designing Artwork in RGB Instead of CMYK
Another common mistake is preparing packaging artwork in RGB. RGB is for screens such as phones, monitors, websites, and digital presentations. Most printed packaging uses CMYK, so artwork designed only in RGB can print differently from what appears on screen.
CMYK doesn’t mean poor color. It means color expectations have to be managed for print production. Before sampling, confirm that:
- artwork is prepared in CMYK when required
- Pantone colors are specified where brand color accuracy matters
- images are high resolution
- fonts are outlined
- bleed and safe zones are included
- finishing layers are clearly marked
- barcodes and small text remain readable
Packaging is a printed product, so the file setup has to match the production method.
>> Read more about packaging printing techniques
Mistake 6: Ignoring Material Thickness and Folding Tolerance
Material thickness affects packaging structure more than many brands expect. A dieline that works for one paperboard thickness may not behave the same way with a thicker or laminated material. Fold lines, closure tension, glue areas, insert dimensions, and finished size can all shift with the material.
This applies to folding cartons, rigid boxes, sleeves, drawer boxes, mailer boxes, inserts, paperboard trays, and collapsible boxes. A material that feels more premium may also need better scoring, wider tolerance, or a modified closure, and sampling is where you find out whether it works with the intended structure.

Mistake 7: Not Checking Small Text, Barcodes, and Labels
Review a sample for function as well as appearance. Small text, ingredient lists, warning statements, product claims, QR codes, barcodes, batch codes, and regulatory information all have to stay readable after printing and finishing.
The risk goes up with textured paper, metallic ink, foil stamping, spot UV, dark backgrounds, small font sizes, curved surfaces, and labels on bottles or jars. A beautiful sample can still fail if the barcode doesn’t scan or the required information is hard to read, so test barcode readability and review all small text under realistic lighting before approval.
Mistake 8: Treating a Handmade Sample as a Mass Production Guarantee
Some packaging samples are made by hand, which is common for rigid boxes, complex inserts, special structures, and early prototypes. A handmade sample is useful, but it may not fully represent mass production. A technician can adjust alignment, glue placement, wrapping tension, or insert position by hand. In mass production, those corrections have to be repeatable across hundreds or thousands of units.
Before approving a handmade sample, ask:
- Which parts were handmade?
- Which parts can be machine-produced?
- Will the production method change later?
- Are there tolerance risks at scale?
- Does the structure require slow manual assembly?
- Can the factory repeat the result consistently?
The approved sample becomes the reference for your production standard, so make sure it is one the factory can repeat.
Types of Packaging Samples
Different sample types answer different questions, and a strong sampling process often uses several of them at different stages.
| Sample Type | Main Purpose | What It Helps Check |
| White dummy sample | Structure and product fit | Size, folding, closure, insert, assembly |
| Digital proof | Artwork and layout review | Text, panel direction, barcode, design placement |
| Printed sample | Print and finish direction | Color, material feel, finish effect, alignment |
| Pre-production sample | Final production reference | Structure, print, finish, assembly, QC standard |
White Dummy Sample
A white dummy is usually made without final printing and focuses on structure, product fit, folding logic, and assembly. It is often the most useful first sample, because the team can still make structural changes before print cost is added.
Digital Proof
A digital proof is for reviewing artwork layout, copy, barcode placement, panel direction, and overall visual alignment. It is useful, but it should not replace a physical sample when the package structure is custom.
Printed Sample
A printed sample shows color direction, material surface, print alignment, and finishing, which may include lamination, foil stamping, embossing, debossing, spot UV, or varnish.
Pre-Production Sample
A pre-production sample is the closest to the final production result. Use it as the reference for mass production quality, especially when the project involves a custom structure, premium finishes, or tight brand standards.
What to Prepare Before Requesting a Packaging Sample
Sampling moves faster when the brand provides clear information at the start. Before requesting a packaging sample, prepare:
- physical product sample if possible
- exact product dimensions and weight
- product photos from multiple angles
- accessories, manuals, inserts, or labels
- preferred packaging format or reference examples
- target order quantity
- target cost range if available
- material preference
- printing and finishing requirements
- dieline or structural reference if available
- artwork file if ready
- sales channel and shipping method
- launch date and expected timeline
If project details are still taking shape, build a clear RFQ before asking for pricing or samples.
>>> Read more about how to request a custom packaging quote
Packaging Sample Approval Checklist
Before approving a packaging sample, review it from four angles: product fit and protection, structure and assembly, print and finish, and packing and logistics.
Product Fit and Protection
- Does the product fit correctly?
- Is the package too tight or too loose?
- Does the product move inside the package?
- Does the insert hold the product securely?
- Can the product be removed easily?
- Is the product protected during normal handling?
Structure and Assembly
- Does the box fold correctly?
- Does the closure work smoothly?
- Is the glue area strong enough?
- Are there signs of cracking along folds?
- Is the package easy to assemble?
- Does the structure slow down packing?
Print and Finish
- Are colors close to the approved proof?
- Is the print aligned correctly?
- Is small text readable?
- Does the barcode scan?
- Are foil, embossing, or spot UV areas positioned correctly?
- Are there scratches, scuffs, bubbles, or uneven coating?
Packing and Logistics
- How will the package be packed into cartons?
- Will surfaces rub against each other?
- Is the package protected during freight?
- Does the finished size affect shipping volume?
- Can the package be stored efficiently?
Approve a sample only when both the brand team and the production team agree on what it represents.
How Sampling Supports Custom Packaging Production
Sampling is the bridge between design and manufacturing. A good sampling round confirms that the dieline works, the material performs as expected, the artwork is production-ready, the finish is practical, the structure can be assembled, the product fits securely, and the package can move into mass production without major changes. That is why sampling belongs inside the full custom packaging design and manufacturing process, not at the end of it.
>>> Read more about custom packaging design and manufacturing process
How a One-Stop Packaging Supplier Helps Reduce Sampling Risk
A one-stop packaging supplier can reduce sampling risk by reviewing structure, material, artwork, sampling, and production together. Instead of treating the sample as a final preview, a production-aware supplier uses it to test whether the package is ready for manufacturing. That support can include:
- product measurement and fit review
- structural design adjustment
- dieline development
- material recommendation
- artwork and CMYK file review
- color proofing
- finish testing
- insert tolerance review
- sample revision management
- production feasibility review
- QC standard alignment
This is most helpful when the project involves custom boxes, rigid boxes, folding cartons, inserts, labels, premium finishes, or e-commerce packaging.
Final Takeaway
Sampling is the step that keeps the wrong package out of production. A thorough sample review surfaces product fit issues, structural problems, artwork errors, color differences, material limitations, assembly challenges, and shipping risks while they are still inexpensive to fix.
When your team reviews a custom packaging sample, don’t stop at whether it looks good. Ask whether it fits, folds, prints, assembles, protects, ships, and can be repeated in mass production.
Need help reviewing your packaging sample before production? Talk to INNORHINO’s packaging team.
FAQ
What is packaging sampling?
Packaging sampling is the process of creating a physical packaging sample before mass production. It helps brands check product fit, structure, material, printing, finishing, assembly, and production readiness.
Why should brands not skip packaging sampling?
Skipping sampling raises the risk of fit problems, print errors, color mismatch, weak structure, difficult assembly, and production delays. A sample catches these issues before mass production begins.
Should I send the actual product to my packaging supplier?
Yes, whenever possible. The actual product lets the supplier measure dimensions, weight, tolerance, shape, surface sensitivity, and fit requirements more accurately.
What is the difference between a white dummy and a printed sample?
A white dummy tests structure, fit, folding, closure, and assembly without final printing. A printed sample tests artwork, color, print alignment, material surface, and finishing direction.
Why should packaging artwork be prepared in CMYK?
CMYK is the standard color mode for most printed packaging, while RGB is used for screens. Artwork prepared only in RGB may print differently from what appears on screen.
What should I check before approving a packaging sample?
Check product fit, dimensions, material feel, folding accuracy, glue strength, insert stability, color direction, print alignment, finishing position, barcode readability, carton packing method, and shipping protection.
Does sample approval guarantee mass production quality?
Not completely. A sample is a production reference, but mass production still needs clear QC standards, material control, process control, and inspection. Review handmade samples carefully to confirm whether the result can be repeated at scale.